The Employee Management App is designed to streamline both the onboarding and offboarding processes for employees. In this app, users can fill in details for new hires and manage employee information, including assigning necessary licenses.
The app offers a ‘Save to Draft’ functionality, allowing users to save their current progress and revisit it later. This enables them to add or update employee information at their convenience before finalizing the entry.
When an employee is offboarded, their resignation date and last salary date are recorded. The responsible person is granted access to the employee’s email and OneDrive, ensuring a smooth transition and continued access to important information.
The employee’s data, along with all associated rights, is then deleted from the company’s database either immediately or 60 days after the resignation date, depending on the selected option.
Prerequisites:
- Azure key vault Connection Reference
- SQL Server Connection Reference
Admin Configuration App:
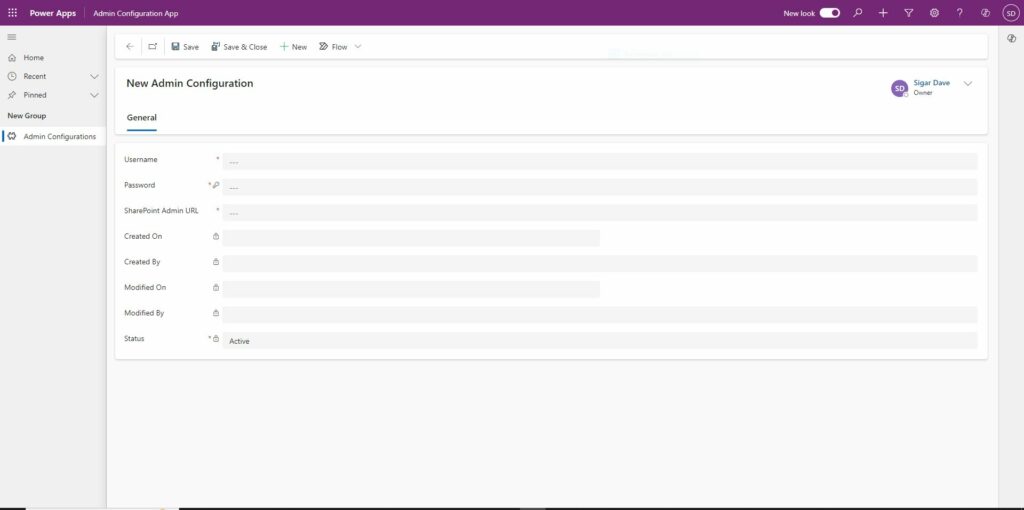
This app collects the necessary details for the Azure function deployment.
The Azure function gives delegation permissions to the responsible person from the offboarded employee.
It includes three mandatory fields:
- Username: User name of the account for deploying your solution.
- Password: Password of the account for deploying your solution.
- SharePoint Admin URL: The URL of SharePoint Admin, for example, https://[your-tenant-name]-admin.sharepoint.com.
Simply Save the form after filling in these three details.”
Grand Admin Consent App:
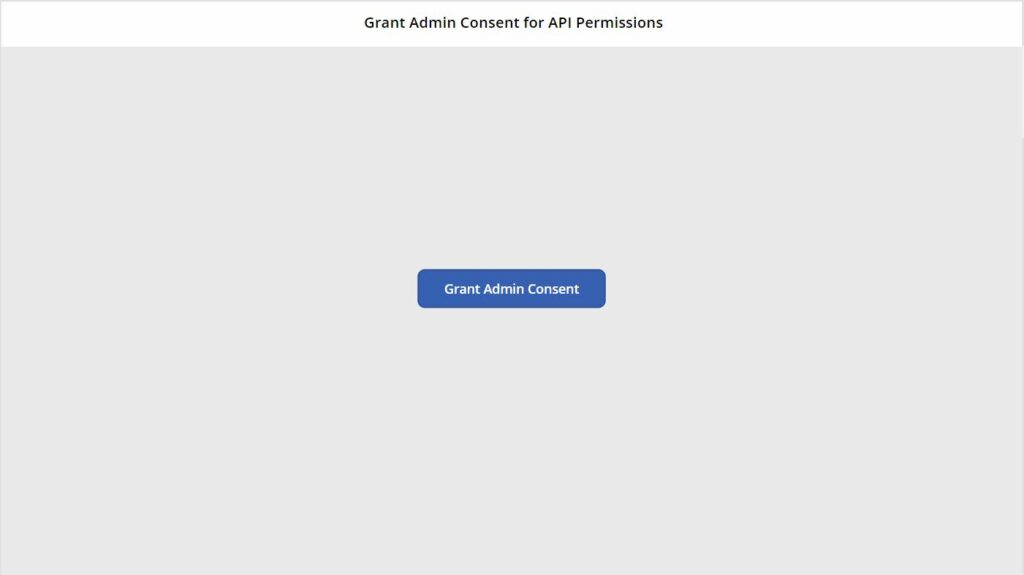
- This application is for grants all the necessary permissions to Azure Application to operate the “Employee Management App”.
- The Application features a button labeled “Grant Admin Consent”. Clicking on this button prompts a popup requesting consent to grant the required permissions.
- After confirming in the popup, all necessary permissions are granted.
- A confirmation message “Your admin consent is approved” is displayed.
- This button triggers a Power Automate flow that grants permissions to the logged-in user.
After completing all these steps, you will be able to access the “Employee Management App”.
Employee Management App
Home Screen

This is the Home Screen of our Employee Management App.
The top left corner features a User profile picture and Name, indicating the logged-in-user.
At the top bottom right corner, there is a “DASHBOARD” button with an arrow suggesting this is the next step for users to navigate to their main dashboard within the application.
Employee Management Dashboard:
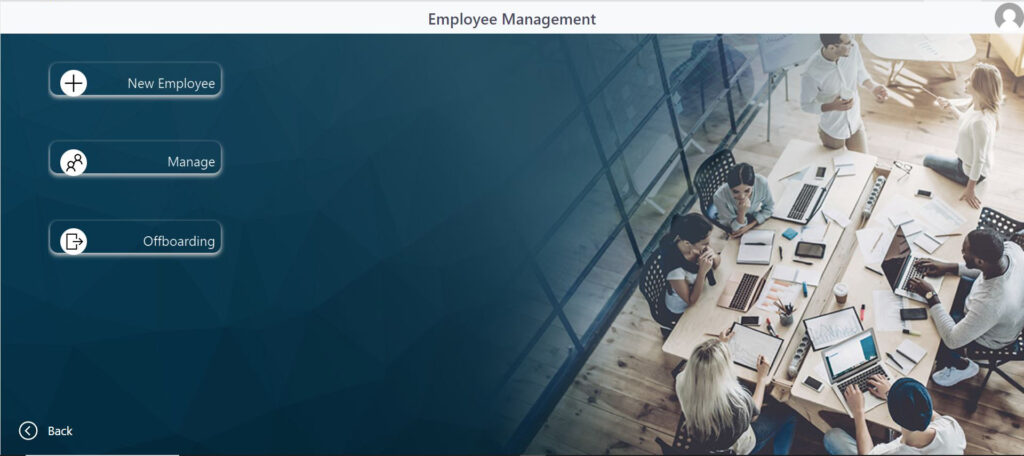
The main screen of the Employee Management App provides an interface for managing employee-related tasks. It is designed to facilitate the addition of new employees, the management of current employees, and the offboarding of employees. Below are the detailed functionalities and components of the main screen.
The Dashboard Consists of three buttons, each representing a key functionality.
1. New Employee
By clicking on this button user can perform a series of steps to add a new employee to the system.
After clicking on this button, users will see the screens below from which the new employee will be created.
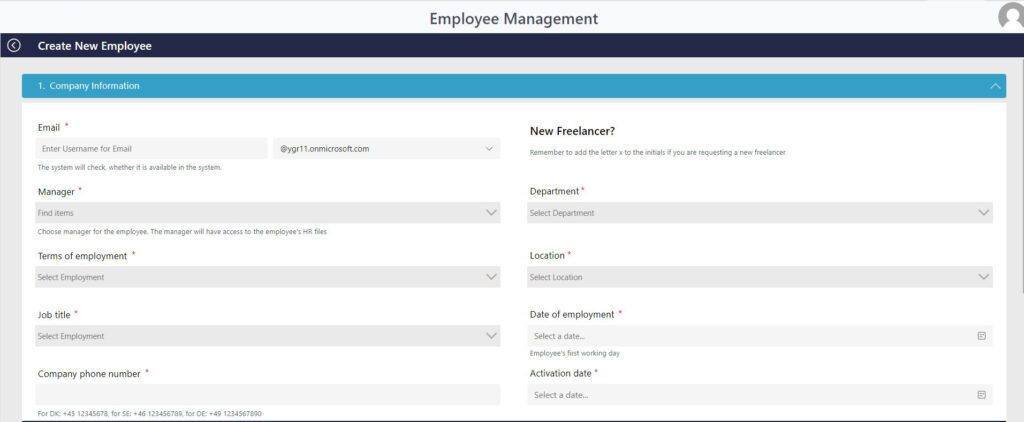
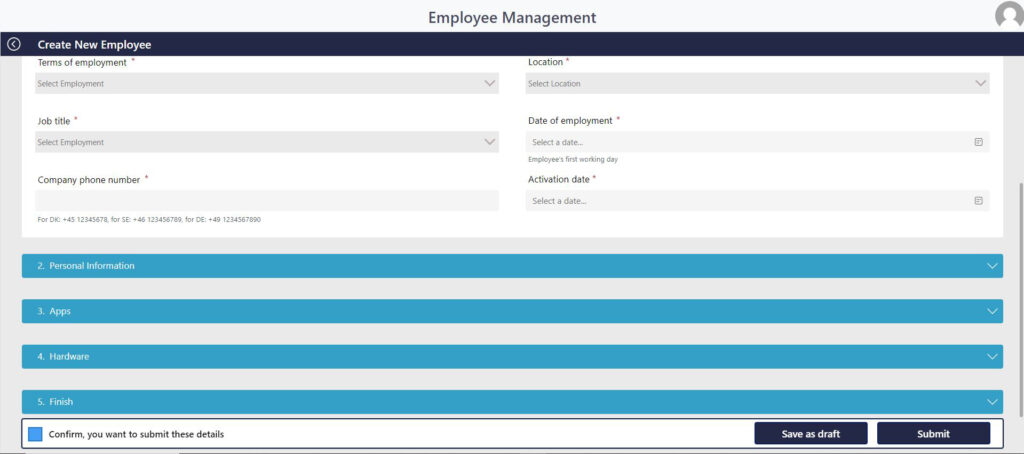
This screen consists of various employee details, such as:
Company Information: Contains information like organization email, manager of the employee, department for which the user is onboarded, terms of employment (e.g., contract, full-time, intern, etc.), date of employment, etc.
Personal Information: Includes the employee’s first name, last name, address, private email, city, etc.
Apps: Lists the required licenses for an employee.
Hardware: Contains the necessary hardware for the employee, such as a laptop and cell phone.
Finish: Contains additional comments about the employee, which are not mandatory.
After checking the confirmation checkbox at the bottom of the screen, the form is submitted, and the entire set of filled details of the employee is sent to a particular group of users related to employee onboarding.
The user can also keep the employee in a draft state, where only the edit option is available. Once the user clicks the submit button, the employee is created in Azure AD, and the status changes from “Awaits Activation.”
After Creating a New Employee, the Flow is triggered in the backend and creates that employee in Azure. The creation of an employee is based on the “Activation Date”.
The Status is changed from “awaits activation” to “employed”
2. Manage
This button enables users to manage existing employees.
After clicking on this button, the user is taken to the screen shown below.
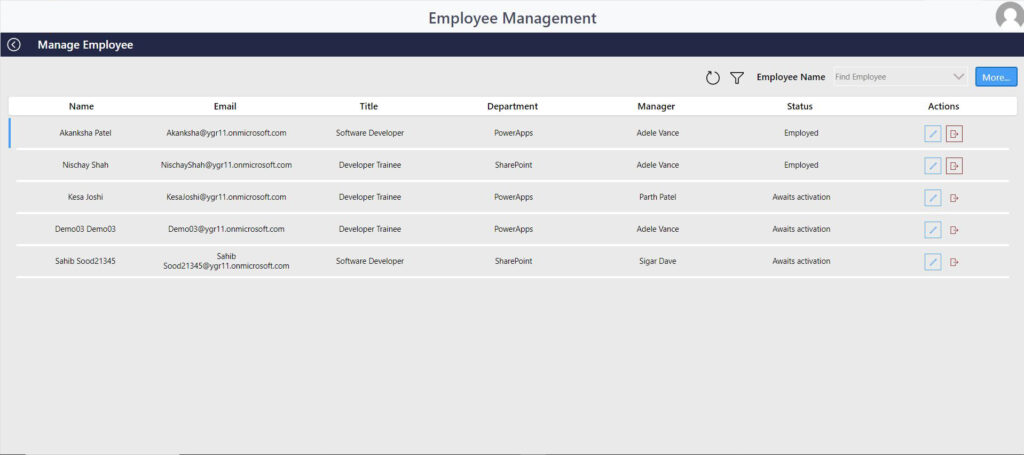
Here, the user can view basic employee information such as name, email, job title, manager, department, etc.
The user can also edit the desired employee information using the highlighted button in the screenshot below, as detailed in the New Employee Creation screen.
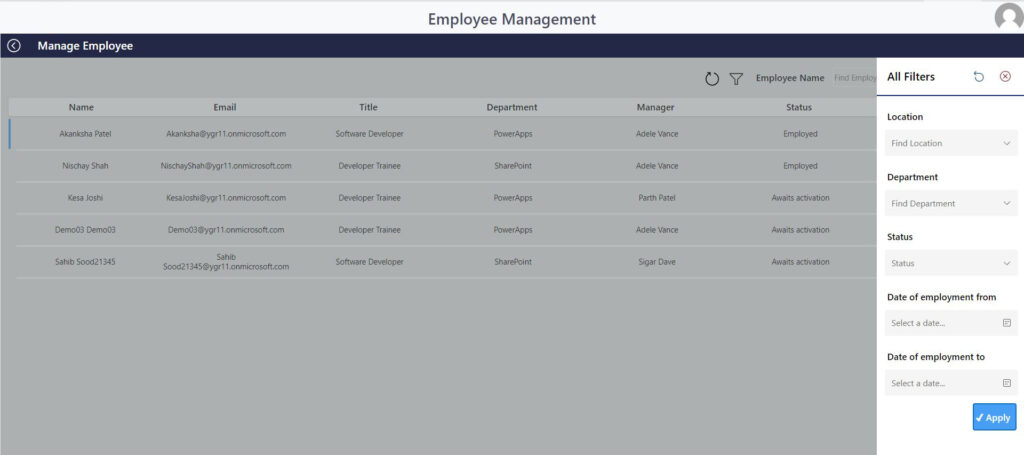
In the top right corner of the screen, the “More” button lets you filter employees by location, department, and other criteria, as shown in the screenshot below.
After clicking the ‘Edit’ button, this screen is displayed.
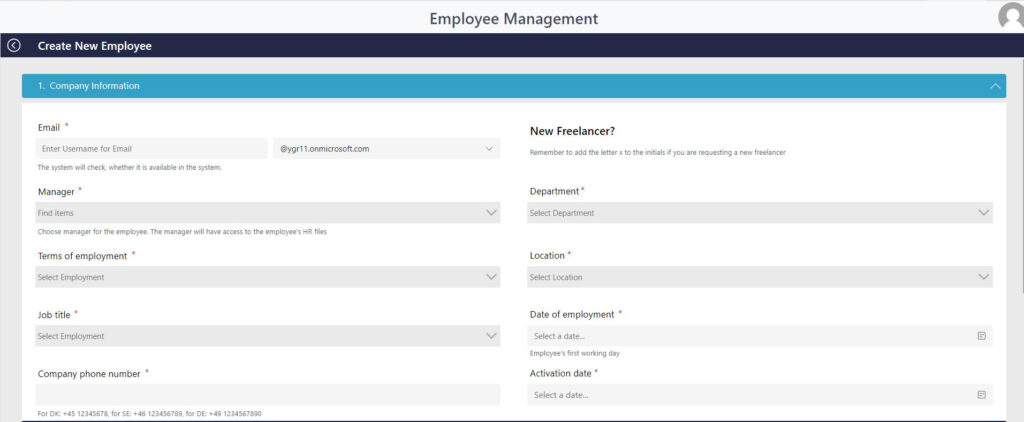
Note: The User is unable to edit the employee’s “organization email” and “Activation Date”. All other details are editable.
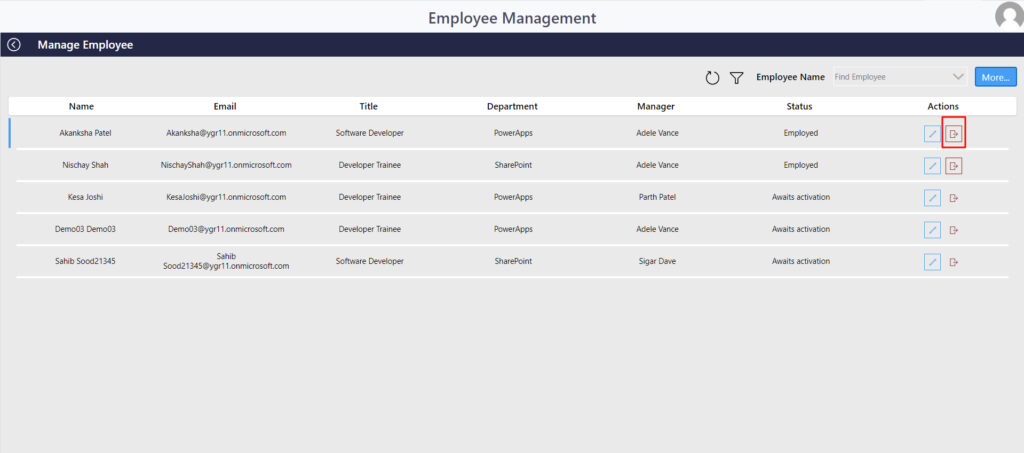
The highlighted button on the above screenshot is used to initiate the offboarding process for the selected employee.
After clicking this button, the screen below will appear.
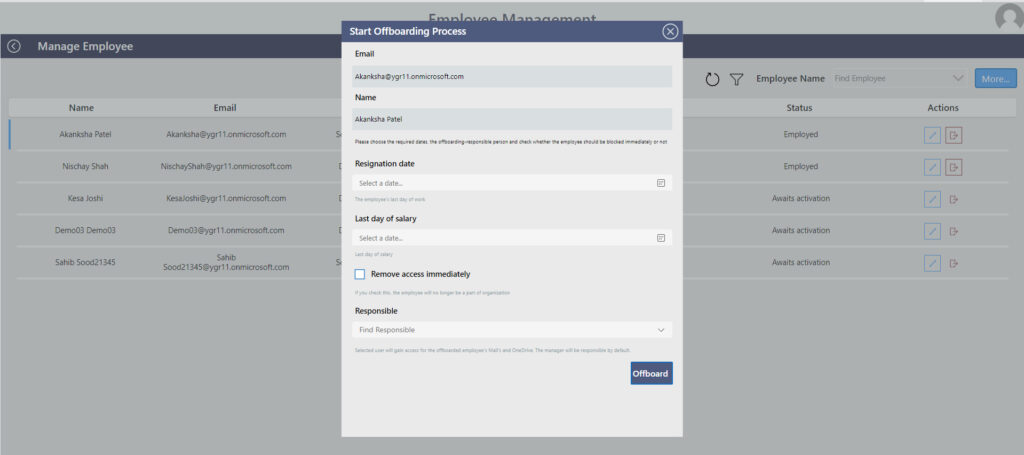
Here the user can fill in the resignation date and the last date of salary for a particular employee
If the user does not select the checkbox for “Remove access immediately,” they must select the responsible person who will oversee the employee who has resigned and the entire right is forwarded to the Responsible Person.
If the user selects the “Remove access immediately” checkbox, the selected employee will be deleted.
Then after clicking on the offboard button, the selected employee is offboarded.
The power automate scheduled flow is used to delete selected employees.
3. Offboarding
After clicking this button, the user is directed to the Offboarded Employees screen, which lists all employees who have been offboarded.
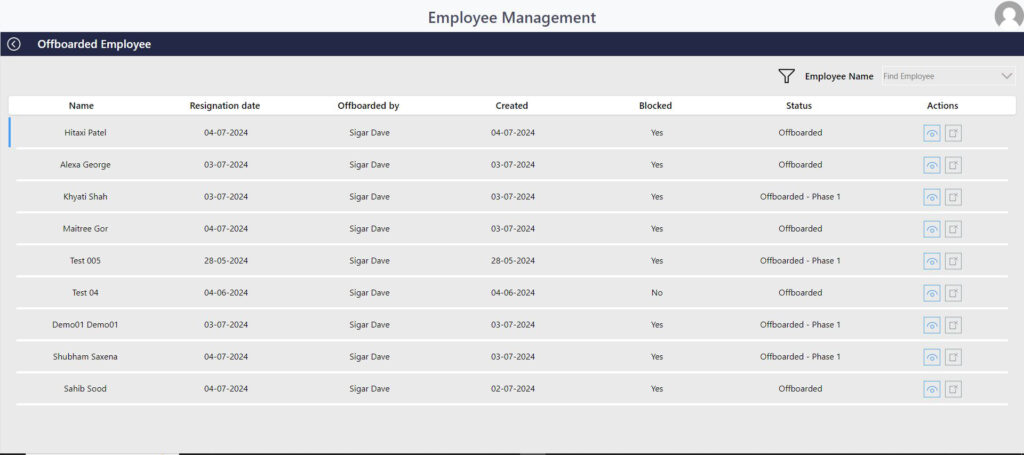
You can search for an employee directly by selecting their name from the dropdown menu.
The highlighted button in the image below contains the selected employee’s details.
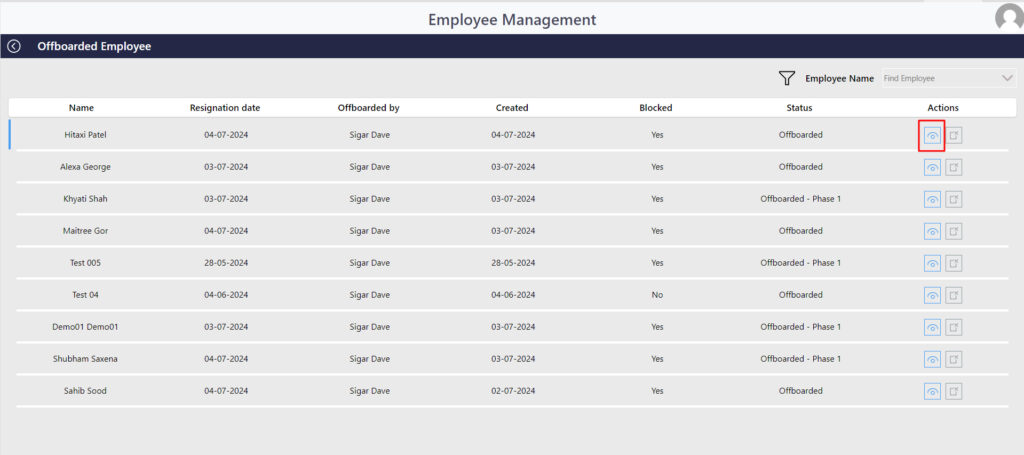
The highlighted button in the below screenshot is used to manage the offboarding process for the selected employee.
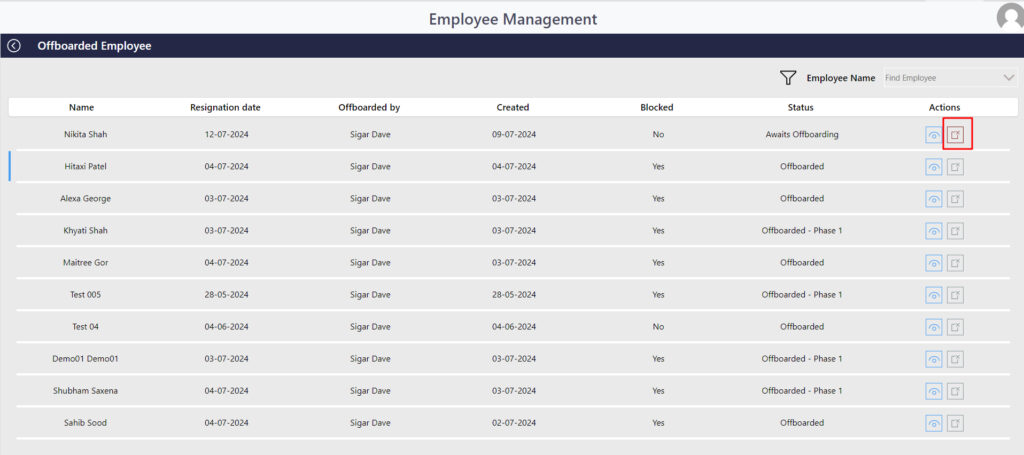
Now, when you click on this button, it opens a popup which is shown in the image below.
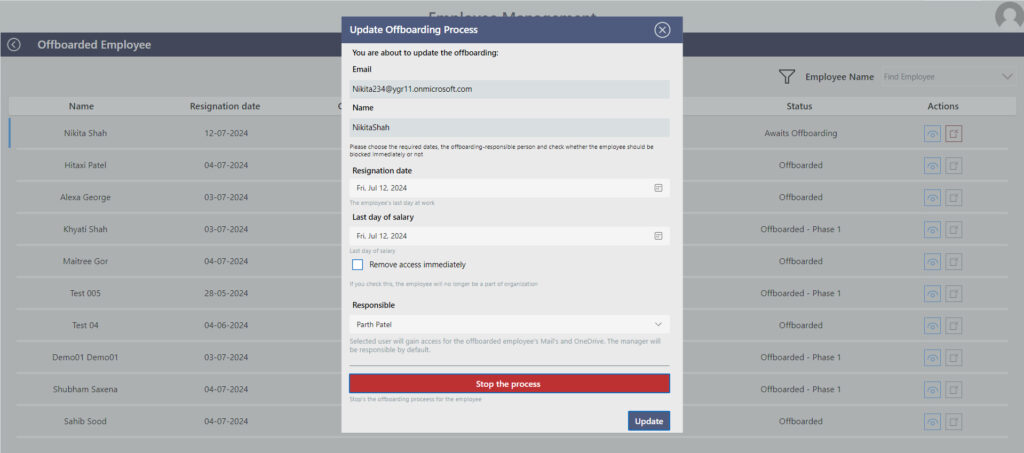
The popup contains a “Stop the Process” button, which halts the offboarding of the selected employee. It sets the resignation date and last day of salary to blank and changes the employment status to “employed.”
If the user selects the “Update” button it updates the resignation date and last day of salary that you have set.
Note: If an employee’s status is “awaits offboarding” and the user does not take any action, such as stopping the process or changing the resignation date and last date of salary, then the status will automatically change to “offboarded” after 90 days.